Please visit our video tutorials at:
A data set is file that contains one or more records. Data sets are created to help gather and disperse vital information such as: an exhibition list for distribution, available works by a particular artist, all works less than a certain retail price, collectors with specific interests for a mailing list, or to find clients interested in a particular artist. In Artsystems Pro, there are three terms utilized for data sets: Marked Records Sets, View Sets, and Worksheets.
Marked Record Set: A Marked Record Set is a method of grouping records together by adding a checkmark next to the desired records for the set. Records are marked by clicking the first column in the Main Content Screen (or by clicking the Marked box on a record's Detail Screen). The Marked Record Set is then gathered by selecting the first item listed in the open module folder listed in the Module Sidebar: Marked Works, Marked Contacts, Marked Editions, Marked Transactions, Marked References.
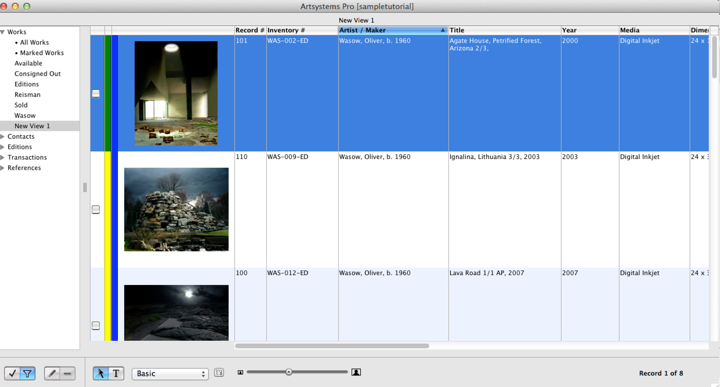
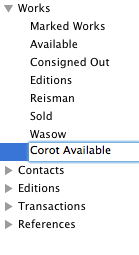
View Set: A View Set is a method of grouping records which have the same attributes or meet a certain criteria, such as all Available work, or all Sold work, or all Contacts who have purchased work by a particular artist. A View Set is a powerful search tool allowing users to select specific criteria for records they are interested in viewing, then Artsystems Pro gathers the precise records that meet the selected criteria to create the data set. View Sets may be saved by simply renaming "New View 1" in the module sidebar folder so they can easily be activated again for future use. A saved View Set is dynamic (automatically updates with changes to database).
Worksheets: A Worksheet is a saved data set that is static (does not change with database updates). Any Marked Records Set may be saved as a Worksheet. A data set saved as a Worksheet can be easily activated any time in the future and is useful for particular lists that require easy access, such as exhibition lists or art fair lists, or works of interest to a collector. Note also that a View Set may be saved as a Worksheet (as long as all works are Marked before saving the group of records as a Worksheet). By saving the View Set as a Worksheet the list will no longer dynamically update with database changes.
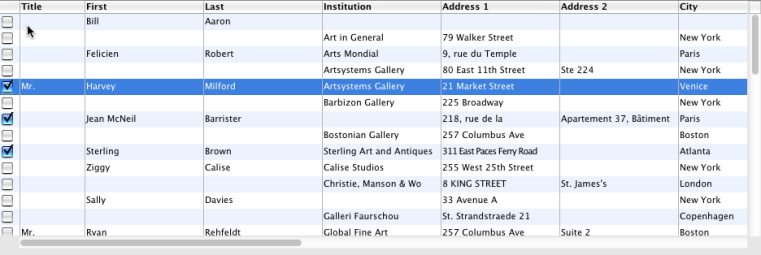
The term Marked Record Set simply denotes a group of records that users have selected with a checkmark. Gathering a Marked Record Set is a two step process; First, select each record for the list by marking the individual record, then to generate the Marked Record Set, select the Marked Record Set Selector (Marked Works, Marked Contacts, Marked Transactions, etc) on the Module Sidebar.
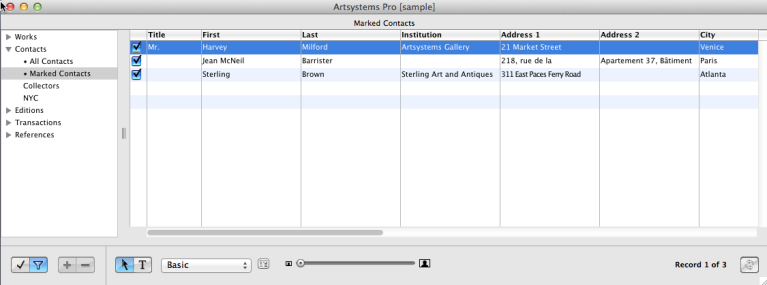
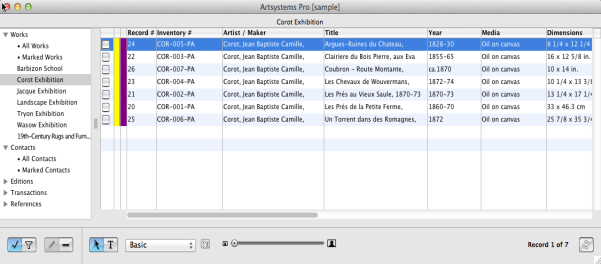
 next to the module name to open the module folder. The second item listed in an open folder is used to create the Marked Record Set. In the example below we clicked on Marked Contacts and ONLY the records which had been marked display in the Main Content Screen.
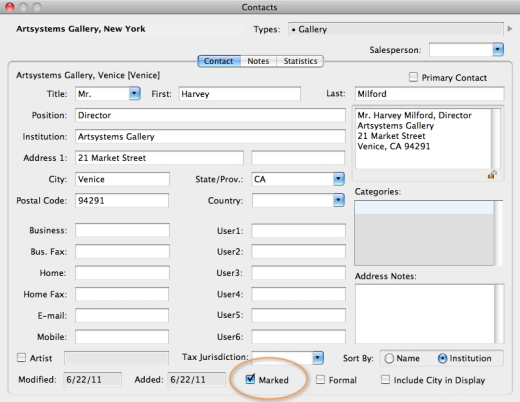
NOTE: In the Works, Contacts, and Editions modules, records may also be marked by selecting the Marked field on the Detail Screen :
To clear a Marked Record Set, and view all records in the module, simply click All Works, All Contacts, etc. on the Module Sidebar.
Located at the top of the program, on the Main Toolbar is the Worksheet and Marking Option  button.
 button to activate the View Set option. next to the module name to open the module folder.
 button (next to the View Set
 button).
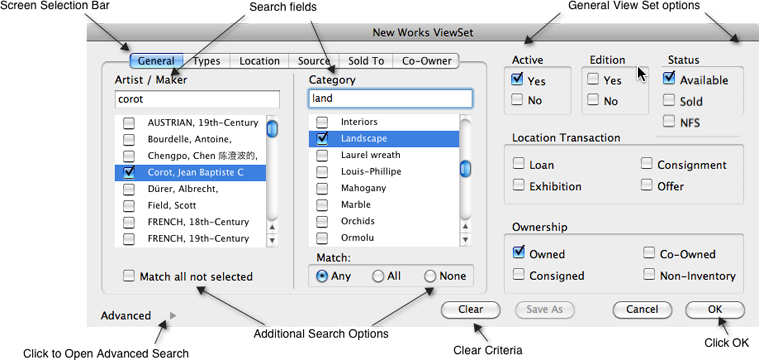
- Utilize the Search fields to easily find a selection in the list for Artist/Maker and Category
- Note the fields with additional search options:
- Artist/Maker
Click Match All Not Selected to find all records that don't match the artists selected- Category
Match Any: Click Any to find all records that match any of the selected categories
Match All: Click All to find only records that have all of the selected categories
Match None: Click None to find only records that have none of the selected categories- The View Set Screen Selection Bar indicates there are more than one screen to select criteria. For example, on the Works View Set Screen there are 6 additional screens: General, Types, Location, Source, Sold To, and Co-Owner. To open another screen, click the screen heading on the View Set Screen Selection Bar (the blue background indicates which screen is currently open)
- Types: Select criteria from the Type and Alt Type fields
- Location: Select criteria from the Contact list to find all records at a certain location/s
- Source: Select criteria from the Contact list to find all records purchased from a source/s
- Sold To: Select criteria from the Contact list to find all records sold to a client/s
- Co-Owner: Select criteria from the Contact list to find all records owned in partnership with a contact/s
- Active: Click either Yes/No
- Edition: Click either Yes/No
- Status: Click either Available/Sold
- Location Transaction: Click Loan, Exhibition, Consignment, Offer to find all records presently out on loan, exhibition, consignment or offer/approval
- Ownership: Click Owned, Consigned, Co-Owned, Non-Inventory
- Click the Arrow
- Click Clear to remove all previously marked criteria (and begin a new search)
- Click Cancel to close the View Set Screen and view all records
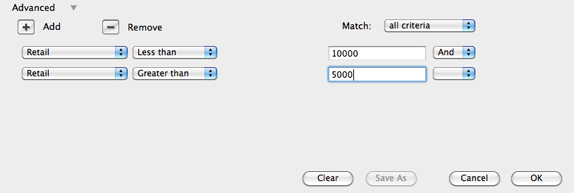
Advanced View Sets give the user flexibility to search by almost any field in the program:
- Click the Add button under 'Advanced' to add a new criteria line item
- In the first column, click the drop-down to select the field to search
- In the second column, click on any of the selections provided: Less than, Greater than, Not equal to, Equals.
Note: The selections provided are dependant upon the search field, for example: If a text field was the selected search field (such as Title, Media, Description, etc.), the selections provided in the second column would be: Begins with, Ends with, Anywhere, Equals, Not equal to, Greater than, Less than- In the blank white field, type in the desired criteria
- If adding any additional fields to search, in the last column click on any of the desired selections provided: And, Or, Not
- Additional adjustments to the advanced search can be made using the Match field, select either: Match Any Criteria, Match All Criteria, Match Not any Criteria, or Custom
- Use the Remove button to remove any undesired line item previously added
- Click OK to generate the View Set
To clear an activated View Set, and view all records in the module, simply click on the module name on the Module Sidebar.
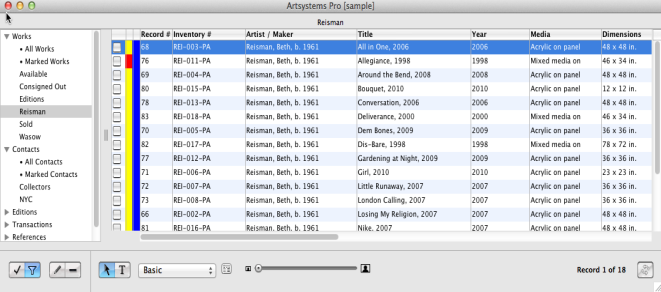
On the Module Display Toolbar click the View Set button to activate the View Set option.
next to the module name to open the module folder. button to activate the View Set option. next to the module name to open the module folder. button to activate the View Set option. next to the module name to open the module folder. button to open the Edit View Set Screen. button to activate the View Set option. next to the module name to open the module folder. button allows all the records to be marked in one go button on the Main Toolbar. to the left of Save as Worksheet to display the blank Worksheet Name and Description fields. Click Save.
button to activate the View Set option. button. button on the Main Toolbar. to the left of Save as Worksheet to display the blank Worksheet Name and Description fields.
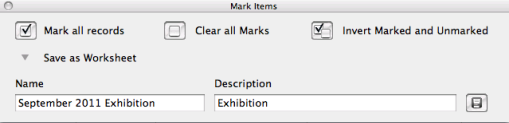
All records must be Marked in order to create a Worksheet. If you started with a View Set, click the Mark all records first, then continue with the next step.
 button on the Mark Items Screen to save the new Worksheet.
To clear an activated Worksheet, and view all records in the module, simply click on the module name in the Module Sidebar.
On the Module Display Toolbar click the Worksheet  button to activate the Worksheet option.
next to the module name to open the module folder. button to activate the Worksheet option. next to the module name to open the module folder. button to activate the Worksheet option. next to the module name to open the module folder. button and select Mark all records (now all records in the selected Worksheet are Marked). button and click the Arrow to the left of Save as Worksheet to display the blank Worksheet Name and Description fields. button on the Mark Items Screen to save the new Worksheet. button to activate the Worksheet option. button.